How independent business owners feel about AI technology

Woman laughs as she receives an AI notification about an incoming lead.

We surveyed HoneyBook members to understand how they feel about emerging AI technologies—the results may surprise you. 

Woman laughs as she receives an AI notification about an incoming lead.

In the past six months, artificial intelligence (AI) has become a big deal, and there’s a good reason for its rise in prominence. AI technologies offer an unprecedented opportunity to optimize time-consuming admin tasks in our businesses and day-to-day life. 

Some AI technologies have assisted us for a while (think machine learning models that help ride-sharing apps predict driver demand or the best routes). What’s new is the widespread availability of generative AI programs like ChatGPT, Adobe Firefly, Canva AI, and others. Many of these new programs use large language models (LLM) to generate text, audio, video, or images based on a prompt submitted by a user, you!

AI is especially interesting for independent business owners because you’re making decisions daily that affect the well-being of your business, and those decisions translate directly to your earning potential. The opportunity to increase your productivity and efficiency is invaluable when every minute saved means more time for those you care about or exceeding client expectations

At HoneyBook, we believe AI can be a powerful tool to improve your clientflow and enhance business outcomes. But we wanted to be sure our enthusiasm was shared by independent business owners. So, we surveyed 463 HoneyBook members between June 8 to 13, 2023, to understand how they feel about AI, from how optimistic they are, to whether they’re using it, and the impact they expect it to have on their businesses. Here’s what we learned. 

A majority (60%) of independent business owners are already using AI in their business

Independent business owners are strong early adopters of AI—60% are using AI currently. Of those using AI actively, 71% use AI-powered capabilities daily or multiple times per week. Independents believe AI will benefit their business and can provide a competitive advantage over non-adopters.

Of these users, Gen-Xers (ages 45–54) use AI technologies most frequently: 34% of Gen-X business owners use AI daily.

While adoption is high, only 22% of independents consider themselves knowledgeable about AI

Despite the interest, most business owners admit they still have a lot to learn. 78% do not consider themselves knowledgeable about AI. This isn’t that surprising given how new many AI programs are but it likely means most independents are not yet experiencing all of the benefits this technology can bring to their business. 

Although most generative AI programs are easy enough to get started with, you should expect some trial and error before your prompt elicits the response you’re looking for. Luckily, education on how to use AI properly is emerging almost as quickly as the tools are. 

Of all the AI-powered platforms out there today, ChatGPT is the most used by a long shot. Around 70% of independents are using ChatGPT, followed by Photoshop (around 15%), and Canva AI (8%).  

While free tools are great for certain tasks, it’s the integration of AI capabilities into existing platforms like Photoshop, Canva, and HoneyBook where the benefits of AI will make the most impact on your workflow. By accessing the benefits of AI from within the software you’re already using every day you can supercharge your efficiency without having to learn a new tool. 

Independents believe AI will positively transform the small business world

At least 78% of independents believe AI will be more transformative than the internet, social media, the iPhone, and online payments technology. In conjunction with this, 40% believe AI will significantly disrupt their industry. As we’ve seen in the past, disruption in the tech world can bring about significant positive changes. 

Pro tip

Over half of independent business owners see AI as revolutionary as the iPhone.

Increased efficiency is considered by independent business owners to be the biggest business benefit of AI (38%). Other advantages include improved customer experience (17%), enhanced decision-making (15%), and cost savings (13%). These perspectives are true across the board, regardless of how long you’ve been in business. 

Many people leave their jobs and become independent business owners to achieve greater flexibility in their lives (53%) and have more time for family (38%). AI technologies further enhance these benefits by reducing the burden of time-consuming tasks like copywriting and photo editing. Because of this, it is advantageous for business owners to adopt smart shortcuts provided by AI tools.

Get back to qualified leads instantly

Respond to leads 20% faster with HoneyBook’s AI priority leads feature—now available on the mobile app.

71% of independent business owners feel positive about using AI in their business

73% of independent business owners believe that using AI in their business will enhance productivity and 85% believe it will provide new and exciting opportunities for running their businesses. Related, 84% feel that AI will allow them to devote more time to doing the things they love—whether that’s travel, exploring new business opportunities, or spending time with those they care about.

Although a significant proportion of independent business owners (56%) have already experienced the positive impact of AI, it is worth noting that the majority (65%) have not seen substantial business growth resulting from its use. While business owners are seeing these positive effects in the day-to-day and weekly use of AI, the use of AI technologies has yet to clearly translate into an increase in cash flow or profits.

Independent business owners are not very concerned AI technologies will replace their jobs, but they are concerned about its regulation

About a quarter of total workers are concerned AI will replace their jobs. Interestingly, despite concerns about job displacement due to new AI inventions, only a relatively small percentage (23%) of independent business owners express worry about losing their jobs to AI. It’s clear that independent business owners perceive AI as a tool to augment their work rather than replace their roles entirely. 

This is especially true for independent business owners who are providing personalized services customized to client needs, like a photographer, marketing consultant, event planner, or web designer. As a result, many tend toward a more optimistic outlook on the impact artificial intelligence technologies will have on their business.

Independent business owners do still feel some uncertainty about the future of AI technologies. Many (57%) believe that the government should regulate AI technologies. So while business owners are largely enjoying the benefits of AI, they also understand that clear guidelines and standards are needed to hold its users (and creators) accountable. 

At HoneyBook, we’re driven to make it easier to run an independent business and technology is our partner in pursuit of this mission. AI is the next technological frontier and we will leverage these capabilities to unlock AI-powered growth for our members.  At the heart of these efforts is an unwavering commitment to responsible development and data usage.

Independent business owners are actively integrating AI into their business operations—those that don’t adopt it may fall behind

59% of independent business owners firmly believe that AI adoption will give them a competitive edge.

To fully understand the impact of the latest AI developments, it is important to consider previous tech revolutions where businesses that did not adapt were left behind. For example, companies that resisted the shift to digital technology during the dot com boom struggled to compete in the digital age.

This sentiment is supported by the fact that around 80% of respondents believe that there are great opportunities for AI to help independents run their business and that AI will make their business more productive. Plus, as mentioned above, 56% have seen their operations impacted in a positive way. 

Those who harness AI spend less time on administrative tasks like email drafting, lead management, video editing, and other time-consuming behind-the-scenes work that independents do every day. The potential benefits make AI worthwhile for every business owner to check out for themselves. 

TL;DR: the majority of independent business owners are using AI for their business and are optimistic about the future

The majority of independent business owners share a strong sense of optimism toward AI technology and are actively embracing it. Their outlook stems from the belief that AI capabilities can enhance efficiency and productivity in their business. Here are our key takeaways:

  • Most independent business owners are already using AI in their business.
  • Independent business owners believe AI will transform the way we work like the internet and iPhone did.
  • Most believe AI will improve productivity in their small business.
  • Few business owners are avoiding AI but most lack the knowledge to take full advantage of all it has to offer

By leveraging AI technologies, independent business owners can supercharge their clientflow and reclaim valuable time to spend with family, friends, on business goals, and nurturing clients. The good news is that AI boosts rather than replaces human work, and independent business owners that adopt AI are positioning themselves to thrive amongst the competition. 

The power of AI is that it gives you back time in your day to focus your time elsewhere. Use HoneyBook’s latest AI features, priority lead notifications and the AI-composer, to identify high-value leads and respond to them instantly. Maximize your time and look professional without any extra effort on your end—and that’s just the beginning of what’s possible with AI at your fingertips. 

Download the HoneyBook mobile app

Manage your clientflow while on the go with the HoneyBook mobile app and get access to our all-new AI tools.

How to integrate HoneyBook client portal with your website

Woman using the HoneyBook client portal on her laptop

Learn how to embed the HoneyBook client portal onto your website so you can wow your clients with a seamless client experience.

Woman using the HoneyBook client portal on her laptop

An excellent clientflow is all about keeping your clients in the loop and communicating effectively throughout a project. 

With HoneyBook’s client portal software, you can provide one simple space for your clients to access files, messages, payments, and meetings. 

This helps you stay organized and gives your clients a smooth project experience from start to finish—all while showcasing your unique brand.

Adding your HoneyBook client portal to your website is easy, whether it’s built on Squarespace, Wix, WordPress, or any other platform.

Jump to: 

The benefits of an integrated HoneyBook client portal

Above all, your HoneyBook client portal gives you one space to organize project work, track statuses, and communicate with clients. It keeps you both on the same page and makes work easier with less back and forth. 

By following the steps below, the end result will be an on-brand client portal that’s easily accessible through a link on your website. 

This creates a cohesive experience for both you and your clients in several ways:

  • Staying organized: The HoneyBook client portal acts as one easily accessible hub where both you and your clients can track activity history, files, payments, and job details in one place.
  • Creating a white-labeled experience: By customizing your client portal URL and login screen to match your brand, your client portal will feel like an authentic extension of your business.
  • Keeping everything documented: The HoneyBook client portal makes it easy to reference any and all versions of files shared between you and your clients. That means contracts, project scopes, email threads, and payment due dates can be accessed in only a few clicks from your website.
  • Added security: The HoneyBookclient portal is built to protect the information shared between you and your clients, making it a more secure option than exchanging sensitive communication over email or chat.
  • Capturing communication in one place: Even when clients respond to HoneyBook emails with their own email, everything will be pulled into one central communication feed within the client portal. That way, no communication will ever be lost.

Pro tip

You can decide whether your clients need to log in to access their client portal, giving you the ability to decide what level of security makes the most sense for your business.

Three steps to integrating HoneyBook with your website

You can integrate your HoneyBook client portal with your website in three simple steps:

  1. Create a custom URL on your website domain
  2. Customize the client portal with your company’s branding
  3. Integrate your HoneyBook client portal with your website

Here’s how to make it happen:

1. Customize your client portal URL

You have two options when it comes to creating a URL for your HoneyBook client portal: using the HoneyBook domain or your domain.

By default, your client portal will be set to use the HoneyBook domain through an auto-generated URL in the form of prefix.hbportal.co/app, where the prefix can be edited from your Company Settings menu. You can check out this Help Center article to learn how to use the HoneyBook domain.

However, we strongly recommend using your domain. By using your own domain, your client portal URL will be in the form of prefix.yourdomain.com, where the prefix is customizable to anything you want, and yourdomain.com is your existing website URL. 

For example, if your website is perfectwebsite.com, you could set your client portal URL to project.perfectwebsite.com.

Why is it so important to use your own domain?

Using your brand everywhere you can is the easiest way to ensure a consistent experience for your clients. The more touch points your clients have with your brand, the more they will come to associate your brand with trustworthiness, professionalism, and reliability.

By using your own domain for your client portal, your clients will feel like they never left your site, as the URL still stays true to your branding.

How to customize your HoneyBook client portal URL

  • From HoneyBook, click your profile photo. Select Company Settings > Domain & client portal
  • In the URL field, click the “Use Company Subdomain” button
  • Register your subdomain with HoneyBook by entering your domain name, choosing your subdomain, and creating the subdomain with your website host by creating your CName record name

The last step is the most involved. Every domain host has their own unique instructions, whether it’s WordPress, Squarespace, Wix, GoDaddy, or other providers.

For full instructions on how to register your subdomain, check out this Help Center article on using custom domains with HoneyBook.

2. Customize your login screen branding

To add to your clients’ feeling that they never left your website, you can customize your HoneyBook client portal login screen to match your company’s branding.

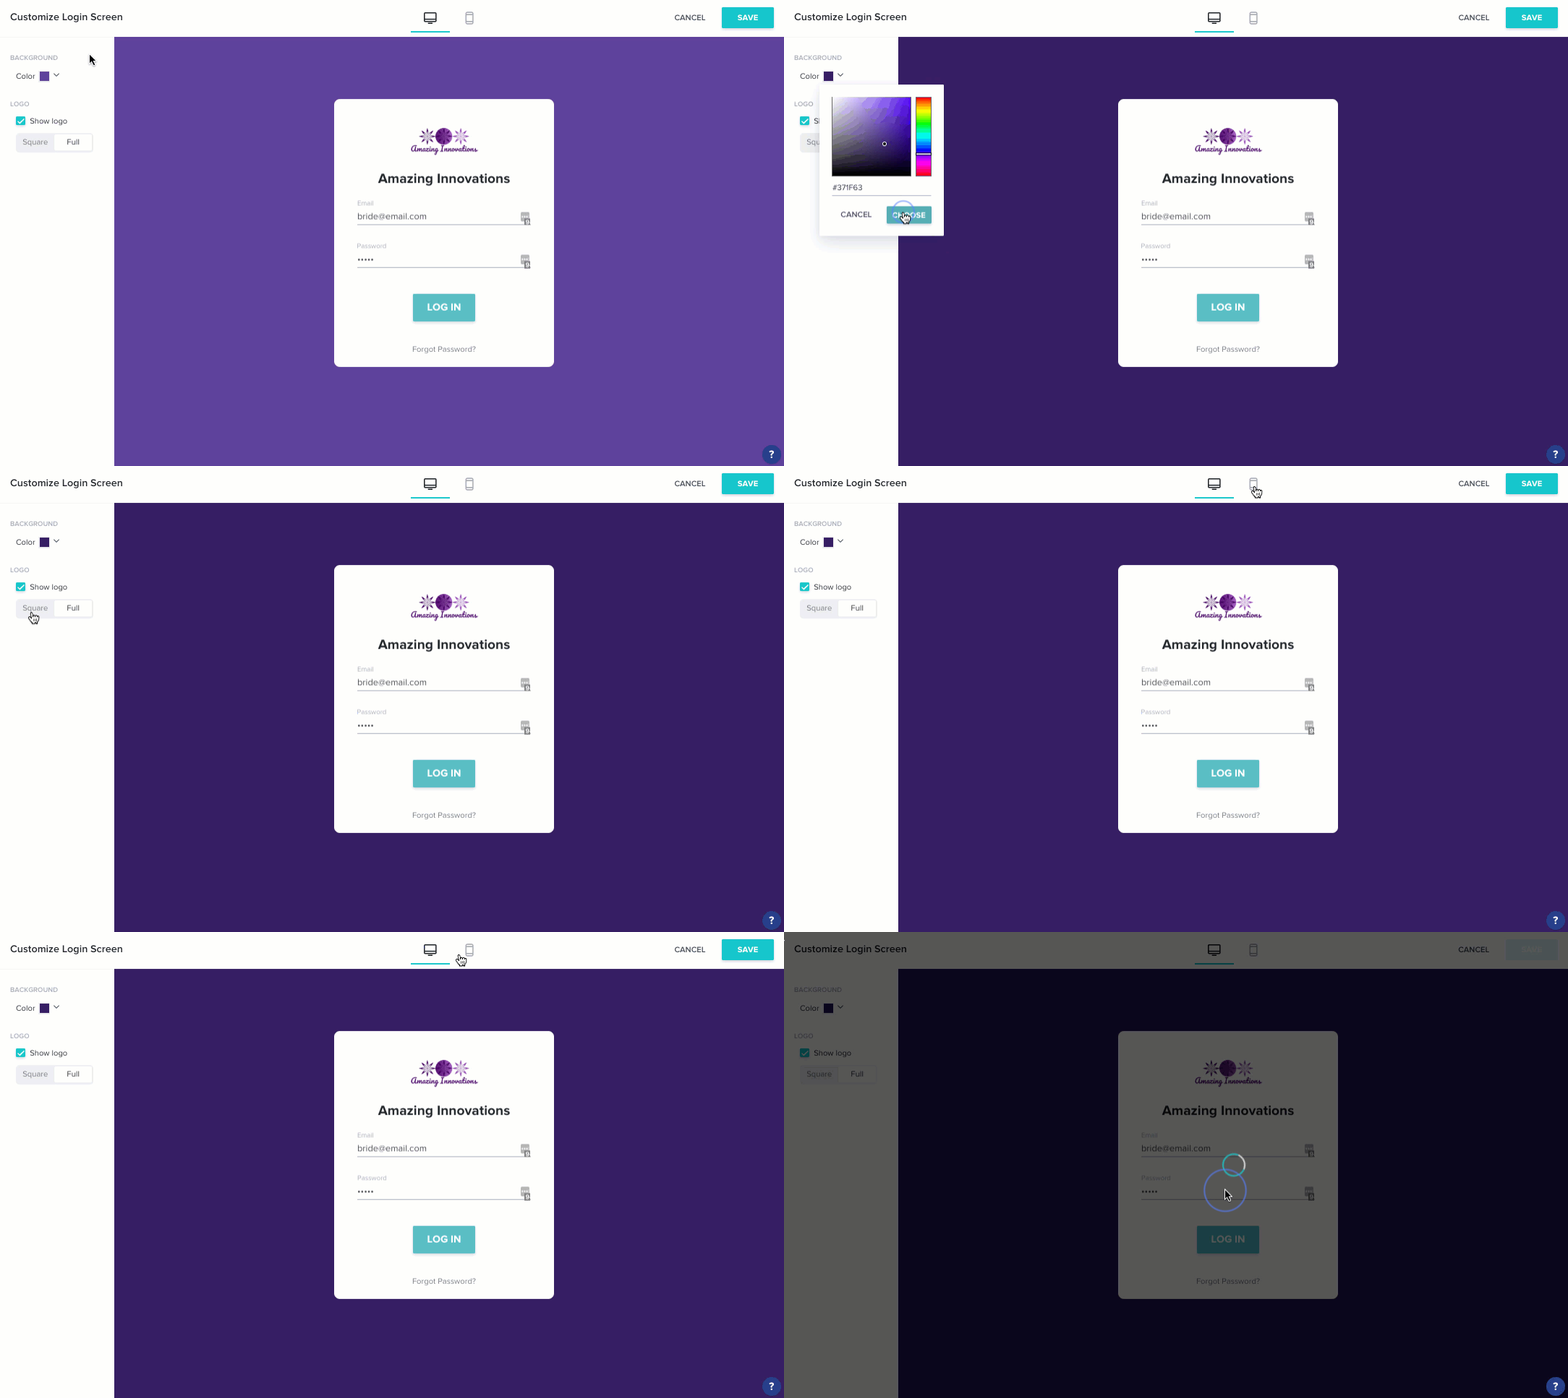
set up the login screen for the HoneyBook Client Portal

To do so, visit your Company Settings from HoneyBook and click the Domain & client portal tab. Then, click Customize Screen in the Login Screen Preview section.

From there, you can customize the background color and add your company logo, ensuring a completely beautiful and on-brand experience for your clients.

For detailed instructions on customizing your login screen, check out our article on your clients’ client portal experience.

3. Link your client portal from your website

Once you’ve customized your HoneyBook client portal, it’s time to add it to your website.

This is easy! Simply add a link to your website wherever you’d like. This can be in your website’s top navigation, footer, or as a button on a page.

When your clients click the link, they will be taken to the HoneyBook client portal where they will be asked to log in.

While clicking this link technically takes your clients off your website, it will still be on the same domain (if you use your custom domain). Therefore, your clients won’t even notice they’ve left your site.

Leveraging more HoneyBook website integration

HoneyBook is a comprehensive clientflow management platform, which means it helps with the entire process of selling and delivering your services. 

Your clientflow always starts with capturing leads, and HoneyBook enables you to do so with a contact form that you can embed anywhere on your website (or share as a link). With these integrations, HoneyBook allows you to manage more of your business without as many software or tools. 

The more connections you create between HoneyBook and your website, the more cohesive experience you’ll provide to leads and clients. 

Manage your clients and projects in one place

Integrate HoneyBook with your website to provide a more cohesive client experience and stay organized.

5 ways to improve email deliverability for independent business owners

Woman uses phone and computer to check her emails after learning email deliverability best practices.

Improve email deliverability for independent businesses with these 5 tips and learn best practices for maintaining your sender and domain reputations.

Woman uses phone and computer to check her emails after learning email deliverability best practices.

What do effective client communication, secure contract exchange, and email marketing have in common? All involve email deliverability. Whether you’re nurturing leads, scheduling a call, sending an important file, or following up for a contract signature, it’s important your emails arrive successfully in your client’s inbox instead of their spam folder. 

As simple as this sounds, email deliverability is complex regardless of what CRM platform, email service provider, or inbox provider you use. Fortunately, there are ways you can improve your email deliverability. 

Factors like email content personalization, sender reputation management, and authentication, all of which we’ll cover in this article, can have a bigger impact on your deliverability than any third-party tools you use. 

Here we go over best practices and specific steps you can take to increase the likelihood of your emails making it to your client’s inbox.

Jump to:

What is email deliverability?

Simply put, email deliverability is whether or not emails make it to the intended inbox. This means email deliverability is central to successful client communication. Without it, your client may not receive important information about the project they’ve hired you for, or they may miss a reminder to sign a contract. 

Some examples of poor email deliverability include emails that are miscategorized as promotional, email marketing that goes to spam, and emails that are technically sent but not found at all in the client’s inbox.

Resolving these kinds of issues is unfortunately not always straightforward. Email deliverability is complex and composed of many different factors. Only some of these factors are in your control. In this article, we’ll discuss what you can control about your email deliverability—namely domain reputation, sender reputation, and authentication configuration—and what you cannot—such as how your inbox provider is integrated with third-party tools and services, and what inbox provider your clients use.

Why is email deliverability so important?

If email is an important part of your client communication, as it is for so many businesses, email deliverability is something you should be familiar with. The multiple factors that comprise email deliverability determine whether your prospects or clients see your email communications.  

If you use email to capture sales and identify qualified leads, it’s important that your emails reach those prospects so you can successfully convert them into booked clients. Otherwise, you could be missing out on new business opportunities. 

If email is your primary method of sending important files and collecting information from clients, seamless email communication is essential to keep your projects moving forward and your client expectations aligned. 

If you use email marketing for lead nurture, it’s important that the leads you’ve qualified receive your content so they can make informed purchasing decisions. Your email deliverability can impact many aspects of your business.

Ways to improve email deliverability in client communication 

Because of how important it is for your emails to reach your client’s inbox, we recommend assessing your email deliverability from the earliest moment you can. This will help you avoid miscommunication, misunderstandings, and ultimately more work on your plate. Here are a few key terms for understanding email deliverability:

  • Inbox providers are the accounts where you and your clients send and/or receive email (think Gmail, Yahoo, or Outlook).
  • Email service providers, or ESPs, are platforms you use to send transactional or marketing emails (think Mailchimp or Flodesk for marketing emails and a clientflow platform like HoneyBook for transactional emails).
  • Domain name, or domain, is like a business or home address, but for a website. The URL www.honeybook.com is a domain. A domain can be used to create a custom email sender domain, for example [your name]@honeybook.com.
  • Email sender domain is the domain from which your email is sent and comes after the “@” in your email address. For instance, @honeybook is the email sender domain for HoneyBook employees. You can have a generic email sender domain from inbox providers like Gmail or Yahoo or a custom email sender domain from your personal or business website, like [email protected] 

There are a number of techniques independent business owners can use to improve their email deliverability.

1. Maintaining a high domain reputation

When you send an email, the recipient’s inbox provider determines if the email is spam or not. A poor domain reputation can route your emails to someone’s spam folder, or result in the email being rejected entirely. For independent business owners, this means clients may miss important pieces of information.

Domain reputation is kind of like a credit score for your email sender domain. Regardless of which ESP you use to send emails (whether it’s Mailchimp or Constant Contact for marketing emails, HoneyBook for client communication, or another), your domain reputation isn’t scored based on the ESP your email was sent from. 

Your domain reputation is attached to the email sender domain you created using your inbox provider (e.g., @gmail.com or @[mybusiness].com). It’s the email address you use to email clients and/or nurture leads.

Keep in mind that if you use HoneyBook’s default email settings, your emails will come from an @honeybook.com email sender domain. This means that the domain reputation will come from HoneyBook and not your own email address.

How to assess your domain reputation

Firstly, it’s important to understand what your domain reputation is before you try and improve it. To learn what your domain reputation rating is, use one of these free tools:

  • Use domain monitoring tools like MxToolbox.com or EmailConsul.com to check if your email sender domain is on any blocklists. Both tools check many block lists, so you’re not just checking a single list at a time.
  • If you’re a Gmail user, and you send marketing nurture emails to a few hundred subscribers, check out Google Postmaster. Postmaster is where you can analyze the success of your email sends and monitor the status of your sender domain.

If your inbox provider offers bounce reports, be sure to review them.

Pro tip

While you may have a great reputation with one inbox provider, it’s possible you won’t with another. For example, if your email sender domain has a strong reputation with Gmail but not with Yahoo, your clients that use Gmail are more likely to receive your email in their inbox, and clients using Yahoo might get it in their spam folder. Each inbox provider’s spam filter is different.

2. Improve your email sender reputation

Your email sender reputation is based on all of your email sending behaviors. This means that your email marketing practices and direct client emails both impact your email sender reputation. For this reason, it’s important to maintain good sending habits from the moment you begin communicating with clients and/or sending marketing nurture sequences to prospects.

Unfortunately, your sender reputation is much more difficult to analyze and monitor than your domain reputation, which also makes it more difficult to improve.

Whether you use a custom email sender domain for client emails, or you send emails from a well-known inbox provider like @gmail or @yahoo, you’ll need to maintain your sender reputation. This is also true if your inbox provider is integrated with your HoneyBook account, which functions like an ESP. 

If a client or someone on your email list accidentally marks you as spam, then your reputation will be hurt, especially if there is a spike in complaints. As a result, other clients and/or subscribers may begin receiving your emails in their spam folders (if at all).

Sender reputation tips for sending nurture emails

If you do send nurture emails (which can be a very successful marketing tactic), be sure your email marketing list is full of people who have consented to seeing your content. Don’t buy email lists because they can contain email addresses that either don’t exist or are frequently sold across many different lists. 

If a recipient’s inbox provider detects that you are sending “cold emails” to people who have not opted into your content, it will flag you as spam and will no longer trust emails coming from your domain.

Sending emails to addresses that don’t exist or to people who are not engaging with your emails (and who may have already marked them as spam) can be considered spammy behavior, which is another reason it’s important to avoid buying lists. It’s actions like this that can damage your sender reputation. 

Here are a few things you can do to improve your sender reputation if you are sending marketing emails as part of a nurture sequence:

  • Regularly remove contacts that do not engage with your content from your sender list.
  • Make it easy to unsubscribe for individuals no longer interested in your email content.
  • Send high-quality email marketing nurture sequences consistently. Erratic sending schedules can flag your email as spam.
  • Be sure your email content is similar to what you’ve covered in the past. Spam filters may flag your emails if the content is noticeably different from the topics you’ve previously addressed. 

Sender reputation tips for sending to clients

If your sender reputation is damaged, it can affect your client communication, too. If you’ve been flagged as someone with poor email sender behavior, both your marketing and client emails may end up in the spam folder. This is why it’s important to have good email sending habits that create a strong sender reputation. 

Here are a few tips to improve your email sender reputation when working with clients:

  • Ask your clients to add you to their contacts so that your email is flagged as being a primary email instead of “promotional” or “social.”
  • If a client doesn’t receive your email, ask them to whitelist you from their inbox.
  • If your client has identified that your emails are ending up in their spam folder, ask them to mark the email as “not spam.” This can help prevent future emails from going to spam.
  • Add your sender name using your ESP’s settings so your client’s inbox will identify you as a safe sender. When sending emails from HoneyBook, your sender name is added to the email automatically.

It is important to reiterate that spam filters are different for each inbox provider. These tips may improve your email deliverability, but they won’t guarantee your emails don’t end up in spam. Need more information? We have a whole article in our Help Center dedicated to improving your email sender reputation.

3. Authenticate your emails 

If there’s one thing you take away from this blog post, it’s this: You must authenticate your emails if you use a custom email sender domain. It’s one of the most common missteps that we see independent business owners make. It significantly impacts the security of your domain which, in turn, impacts email deliverability. 

Email authentication can get pretty technical, but it’s important you take the time to understand authentication protocols. To authenticate your emails, you’ll need to implement email authentication protocols like SPF (Sender Policy Framework), DKIM (DomainKeys Identified Mail), and DMARC (Domain-based Message Authentication, Reporting, and Conformance). If you send marketing emails, you’ll also want to authenticate BIMI (Brand Indicators for Message Identification). These protocols prevent spammers from spoofing, or faking your domain, which can severely damage your sender reputation.

Pro tip

If you use a custom email sender domain, you must implement email authentication protocols. Overlooking this critical step can significantly impact your deliverability.

How to assess your email authentication protocols

Email authentication is most important for independent business owners using a custom email sender domain like [yourname]@[yourbusiness].com. Many business owners choose to use a custom sender domain to appear more professional to their clients. This is a great tactic but will be unsuccessful if your emails don’t reach those clients. You must authenticate your email in order to secure your custom email sender domain. 

Occasionally hackers will find non-authenticated domains and send emails from them. What this means is that if your domain isn’t authenticated, your email sender domain is vulnerable to hijacking. Hackers can then use your email to spam people, and this can damage your domain reputation. 

If you use HoneyBook’s default email settings you do not need to independently authenticate your email. These emails are sent from the @honeybook.com sender domain and are authenticated. 

The same is true for business owners using a generic sender domain like @gmail.com or @yahoo.com. If you use a free inbox provider with a generic sender domain, you do not need to authenticate.

On the contrary, if you use a custom sender domain tied to an inbox provider like Gmail, where you use an @mycompany.com email address but they go to a Gmail-provided inbox, you will need to authenticate.

Pro tip

HoneyBook is beta launching a domain testing tool that will allow members who use a custom email sender domain (like @mycompany.com) tied to a Gmail account to check whether their SPF and DKIM authentication protocols have been set up properly. Learn more about SPF, DKIM, and DMARC protocols in our help center.

 With HoneyBook, you can integrate your inbox provider so that emails sent from the platform come from either the custom email domain of your choosing (e.g., @gmail.com or @mycompany.com).

If you’d like to integrate your own custom email sender domain with HoneyBook but don’t know how to set up your domain records, we recommend hiring a professional.

4. Write personalized, authentic, direct emails

Emails that overpromise results, sensationalize services, or are formatted unconventionally are often flagged as spam by inbox providers. Additionally, words in the subject line and/or body that indicate pressures to purchase like “buy” or “as seen on”  are red flags for inbox providers. 

Ways to personalize your emails

Each email you send should be personalized for the recipient. Your emails should also be signed with your name. If the email is sent to an unidentified person or doesn’t mention your client’s name (e.g., “Hi,” instead of “Hi Janet,”), it may be flagged as generic spam.

Craft creative subject lines that tell the recipient exactly what they can expect from the email without any grandiose phrasing. For example, “Last Call for Discounted Portrait Bookings” is both generic and excessively grand. 

Address each email to your client. This is easy with HoneyBook’s smart fields. Smart fields pull your client’s name from contracts or other documents and propagate it in every email. 

Personalization can help you in other ways, too. Emails personalized to the reader receive 10% higher conversion rates than those that aren’t personalized.

If you’re using a clientflow platform like HoneyBook, or communicating straight from your inbox, be sure to begin the email with your client’s name every time.

5. Optimize email design and formatting

Make sure your emails are formatted conventionally and are easy to read. Use a clean layout, concise subject lines, and relevant preview text to signal your client to open important emails. 

Fortunately, email design does not have an immediate, long-term impact on your domain or sender reputation. It does, however, impact the deliverability of that single email if its load time is bogged down with large pictures or files.

Tips for email optimization and design

When drafting basic emails and/or when sending emails using your email service provider, don’t use over-the-top HTML designs that are code heavy. Examples of over-the-top email design are emails that include large photos or images, videos, and anything that slows down load time. 

Keep messages to the point, and you’ll find your emails will be more effective on the client side as well. Simple, action-oriented emails perform best when you want your client to kick off a project, pay an invoice, or read important information.

The complexity of email deliverability

Email deliverability is both very important and incredibly complex. Client communication is essential to your independent business, and sending emails is naturally part of this. However, understanding email deliverability is knowing that there is no single solution that will ensure 100% of your emails will be delivered. 

Because email deliverability is influenced by multiple inputs and variables, and sending emails requires different software programs working together, things can get messy. We recommend familiarizing yourself with various inbox providers’ email sender best practices so you’re well-versed in what they see as legitimate and can structure your email communications accordingly.

While there are strategies that can increase your likelihood of delivering to the correct inbox consistently, no platform—inbox provider, ESP, or otherwise—can guarantee this. 

Manage client communication effectively with HoneyBook

HoneyBook is a clientflow management platform for independent business owners, helping you to sell and deliver your services easily online. Clear and consistent client communication is an essential part of that process and HoneyBook can help you keep it all in check. 

Use these email deliverability best practices as reference material when building or updating your email communications. By deepening your understanding of this critical topic you will feel more confident addressing challenges and improve your business outcomes in the long run. 

When in doubt, HoneyBook members can connect with our support team via the question mark icon in your account.   

Manage your client communication with HoneyBook

Delight your clients with a better experience. Try HoneyBook free for 7 days; no credit card required.

How to use a welcome packet to successfully onboard new clients 

Three people meeting to discuss client onboarding

Learn how to create a client welcome packet that introduces your business, informs your new clients, and adds delight to your client experience!

Three people meeting to discuss client onboarding

Critical files and collateral for independent businesses often include invoices, contracts, sales brochures, and more. But, there’s one tool you might not be using, which can play a big role in creating a great client experience and setting your projects up for success. That tool is a client welcome packet. 

When you start any project or working relationship, it’s always important to get the last pieces of information that you might not have captured during the booking process. You also want to set expectations with your clients about how you should be working together and communicating. Lastly, you want to create a great impression, and that starts at the very beginning of your relationship with your client onboarding

Here’s everything to know about using a welcome packet with your clients and best practices to make sure yours is effective. 

Jump to: 

What should your client welcome packet include?

Your client welcome packet communicates all the important details that you would like to share with a new client. This includes information that can help build your relationship, as well as detailed information about the project. 

You can include everything such as a bio, your client onboarding process, your communication preferences, the project timeline, how the client can track statuses, and more. 

We’ll break it down further below. Keep in mind that your specific welcome packet may vary depending on your client onboarding checklist. For most independent businesses, here’s what your client welcome kit should include the following.

1. Welcome message and introduction

First, take the time to thank your new client for booking with you. You can include a brief note on the first page of your welcome packet, or save it for the introduction email you send along with your packet. Either way, mention something specific from when you were first talking to them as a lead, and make sure they know how excited you are. 

Even though they probably already know about your business from their own research before booking, give your new clients a refresher about who you are as well as the mission statement behind your business. This is also a great opportunity to introduce them to your team if they’ll be working with others along with you. 

2. Policies

Next, get the serious stuff out of the way. Take the time to remind your clients about some of your policies, which should have also been in your online contract. You don’t have to copy and paste your contract clauses, but it’s a good time to reiterate late payment fees, payment processes, confidentiality agreements, and more. 

3. Communication preferences and information

Be sure to give your clients instructions on how they can communicate with you moving forward. You should also include your office hours so they know when you’ll be able to respond and when you’re offline.

Include your contact information or a link to your scheduling tool so they’ll always be able to get a hold of you. 

4. Login details and tech overview

Different businesses use different technologies, so this section will especially vary, but it’s important to get your clients up to speed as soon as they’re onboarded. 

If you’re a photographer, for example, you might just have a client portal and invoicing software that your clients will need to know how to log into to get their photos and pay their invoices. For other businesses like consultants, you might have more tools like project management software, so you’ll need to include specific instructions for how to log in and use the system. You might also want to leverage part of your onboarding packet as an intake form to ask your clients to share specific documents.

5. FAQs

Are there common questions that you get throughout your projects? This is a great place to address them upfront and give your clients a set place to refer to them throughout the project. These might include how to use your client portal, how to adjust their payment schedule, where to find project updates, and more.

6. Timeline and scope of work

Once you’ve briefed your clients on all the general information about your business and working with you, it’s time to get into the specifics of their project. Lay out the timeline and scope of work that you’ve already agreed on in your contract. 

At a high-level view, it can be great to call out important milestones and key dates that you’ve already set together. 

7. Payment information

The most important part of running your business is getting paid! Don’t forget to reiterate everything your clients need to pay you. You can include their specific payment schedule along with a reminder of how you accept payment (credit card, ACH transfer, etc.) or within an online payment software

8. Next steps

Lastly, you want to include next steps for each client. Will you be working on their project for a few weeks until the next check-in? Will there be a while until they hear from you next? Or, is there anything you need from them? Remind them to send over any important documents and files or send information you might need to get the project started. 

Best practices for your welcome packets

As you’re designing your welcome packet, keep in mind these best practices to ensure you’re providing a great onboarding experience for your clients.

Make sure your client welcome packet is part of your brand

The most important thing about including a welcome packet in your client experience is that it has to be a completely branded package. This means it has to involve more than just shoving your logo into a client welcome packet template, adding text, and calling it “ready to send.”

Your client welcome packet is like holding the front door to your studio wide open to invite potential clients in. It sets the tone for your business. When it’s not cohesively branded or doesn’t fully jive with your website or social media profiles, potential clients notice and can feel the disconnect.

Keep your welcome packet concise and easy to navigate

Though there’s a ton of information to include in your welcome packet, try to keep it as simple as possible. Each section should have its own page that’s easy to navigate through a table of contents. Be sure you’re only providing the information–there’s no need to add paragraphs of text on each page if it’s unnecessary. 

Make your client welcome packet an interactive experience

Want to upgrade your client welcome packet even more? Use a system like HoneyBook to make it interactive. Instead of a stale, static PDF, you can build fully branded, digital files that incorporate your visual brand along with video, photos, and interactive elements like questionnaires. You can provide your information while also giving your clients a professional, immersive onboarding workflow from the start.

Use the right tool to build branded, effective client welcome packets

You can build your welcome packets with a variety of tools, including docs, PDFs, and slideshows. However, you want your packet to be a living, breathing document that your clients can return to over and over again and use to refer back to different parts of your process. 

That’s why it’s best to use a clientflow platform to build your client welcome packet. With a system like HoneyBook, you can build your welcome packet as an interactive template that syncs with other parts of your process. Clients can immediately schedule inside the welcome packet, view an online invoice, refer back to their contract, and more. 

Make sure a welcome packet is part of your clientflow

Leverage HoneyBook templates to incorporate your brand elements and create an interactive experience.

How to remind someone to pay you: 7 tips & examples 

Person working on a late payment reminder

Here’s how to remind someone to pay you and ensure you actually get paid. Use our 7 tips and examples to ask politely and ensure you’re paid on time. 

Person working on a late payment reminder

While nobody likes to chase after their clients to get paid, it can be a natural part of running a business. 

Learning how to remind someone to pay you is key to ensuring positive cash flow, successful projects, revenue growth, and good client relationships. 

With the right tools and strategies, you can also take much of the work off your plate when it comes to chasing down payments. With automatic reminders and online invoices, it’s easier than ever now to get paid faster. 

Here’s how to remind someone to pay you so you can feel less stressed about collecting payments

Jump to: 

1. Include all the payment details up front

The best way to get paid is to avoid the need to hound your clients in the first place. When it’s time for your client to pay their first invoice, make sure you’re providing the entire payment plan upfront. 

Oftentimes, people simply forget due dates–it’s not that they’re trying to avoid paying you. 

Within your online invoice, include the following details and payment terms: 

  • Invoice number
  • Due date
  • Remaining balance
  • Additional due dates
  • Late payment policy and any associated fees

As soon as you send your first invoice, be sure to confirm with your client that they’ve received it. If they have any questions, you can take the time to answer those at the start of the project before you get into it and more payments are due. 

2. Schedule payment reminder messages

The best way to remind your clients to pay an invoice is to send them a series of payment reminder emails.

Unfortunately, if you have a lot of clients, the time it takes to send dozens of payment reminder messages will add up quickly.

By using a payment reminder software like HoneyBook, you can make your life much easier by automating email templates to send out on a predetermined schedule. For example, you can send a polite email reminder for payment a week before the invoice is due, on the day the invoice is due, and two days after it’s due if the client still hasn’t paid.

Setting up a series of payment reminders can feel like overkill at first, but in most cases, your clients will appreciate the reminders—especially if the reminders provide them with a link to pay the invoice immediately with an online payment software.

Include the following information in your payment reminders: 

  • Use clear subject lines
  • Re-attach the original invoice
  • Write in a friendly tone, even if payments are late
  • Make the payment due date clear, and reiterate the payment terms they agreed to
  • Remind them how they can pay, and list the payment methods you offer
  • Provide clear details of the work they’re paying for

Once the client’s payment is late, you can also include your late payment terms —but don’t sound too threatening.

3. Send payment reminders that are personalized and automated

If you’re automating emails, you might feel like they can come across too stiff or impersonal. But, you can easily have the best of both worlds with reminders that are both personalized and automated, so they still take work off your plate. 

Try an email system or automation software that lets you incorporate your brand. With HoneyBook, for example, you can implement your personal email signature and branded headers that you might use. 

When you’re setting up your payment reminders, write in your natural voice and tone. Personalization doesn’t have to mean every single email is unique–it just means you’re still adding your personal touch while relying on automation. 

If you’re still worried, you can choose to approve your automated reminders before they send. You’ll get a notification that they’re ready to go, giving you the time to update them with any specific details for your client. 

4. Offer multiple payment options

When your client’s payment is due, you want to make it as easy as possible for them to pay. Always give your clients the benefit of the doubt. Everyone has a lot going on, so a late payment could just mean they’re confused about how to pay. 

Provide a seamless online payment experience by offering multiple payment methods, linked directly from your online invoice. With a payment processor that includes invoice templates, you can offer credit and debit card payments as well as ACH payment processing

If your clients have to track down their checkbooks or pay via cash, you’re more likely to deal with an outstanding invoice. 

5. Try a phone call

If emails aren’t working, it’s time to pick up the phone. Sometimes, a two-minute phone call is all it takes to get a payment issue resolved.

When calling your client:

  • Introduce yourself (if needed)
  • Clarify you’re calling about a late payment
  • Speak clearly and professionally
  • Give your client the benefit of the doubt
  • Be polite (even if your client isn’t)
  • Summarize what was agreed to on the call before hanging up

Try to avoid asking why the payment is late, but you can offer to provide any additional information needed to make the payment happen.

6. Remember to politely remind your client to pay

Keep in mind that your client most likely isn’t trying to swindle you. Your goal is to get paid as soon as possible and move forward with your project, not sacrifice a client relationship. 

Whether you’re scheduling automated reminders, hopping on the phone, or texting with your clients, stay personable and polite. 

You can use these payment reminder examples that incorporate professional yet polite language, but be sure to incorporate your personality to make sure they sound natural as well. 

7. Refer to your contract details

If your clients aren’t responding or aren’t working with you to make their payment, it’s time to refer to your contract details. 

Your late payment policy should include a timeline of late payment fees, interest applied to overdue payments, suspension of services, and cancellation. 

For instance, your late fees might apply after an invoice is 7 days overdue. From there, you may suspend services and apply interest to the late payment for 30 days. After 30 days, you can reserve the right to cancel your client’s contract. You can adjust this timeline as needed, but these terms can help you protect your business. 

As you remind your client to pay, remind them about these late payment terms as well. Once you hit certain milestones, you’re well within your rights to withhold services, as long as it’s in your online contract

At this point, you still want to keep your communications professional, and simply stick to the terms of your contract. 

Use attorney-reviewed online contracts

Protect yourself against late payments with HoneyBook’s online contract templates.

Examples of kind reminders for payment

As mentioned above, it’s best to send your client a series of payment reminder messages encouraging them to pay on time rather than waiting until the payment is already late.

For example, you could send payment reminders:

  • One week before payment is due
  • On the payment due date
  • Two days after payment is due
  • One week after payment is due

Here are a few payment reminder message templates you can send to your clients:

Upcoming payment reminder

Here’s an example email sent one week in advance:

Copy/Paste Template:

Upcoming Payment Reminder

Hi Nick,

I hope you’re doing well! This is a friendly reminder that invoice #25, totaling $1,234, is due for payment on October 25th—one week from today.

Please feel free to contact me if you have any questions about the invoice or payment details.

Thank you,

Jeff

Tired of reminding clients to pay? Use automatic reminders.

HoneyBook’s payment reminders automatically remind clients about upcoming payments, due dates, and past-due invoices.
So you don’t have to.

Due date payment reminder

If you need to send a payment reminder on the due date, you’ll want to include more details to make it easier for the client to pay you:

Copy/Paste Template:

Due Date Reminder

Subject: Payment Reminder: Invoice #25 – Due Today

Hi Nick,

Hope you’re doing well. This is a reminder that invoice #25 is due for payment today (October 25th).

To remind you of the details:

Project name: Blog posts

Due date: 10/25/2020

Amount: $1,234

I’ve reattached the invoice for your convenience. Payment can be made by direct deposit, bank transfer, or check.

Best wishes,

Jeff

Late payment reminder

If the payment is late, you can use a more stern tone while still staying neutral and friendly. If applicable, you may want to include any consequences of late payments.

Copy/Paste Template:

Late Payment Reminder

Subject: Payment Reminder: Invoice #25 – One Week Overdue

Hi Nick,

As per my email reminders, payment for invoice #25, totaling $1,234, is one week overdue. I’ve reattached the invoice for your convenience. Payment can be made by direct deposit, bank transfer, or check.

Please note that a 5% late fee will be applied if the payment is not made within the next 2 business days.

As always, let me know if there’s anything I can do to help!

Best wishes,

Jeff

Use the right tools to avoid late payments

Instead of remembering how to remind someone to pay you, it’s better to avoid it altogether. Luckily, it’s entirely possible when you have the right tools. 

Usually, clients forget to pay you because they forget the due date, it isn’t easy to pay, or they simply aren’t a great fit anymore. 

Using HoneyBook’s clientflow management platform, you can always ensure you get paid. Use file templates that help you evaluate your leads and ensure they’re a good fit for your services. From there, send online contracts and invoices in the same file so clients always have to agree to your payment terms before signing and paying upfront. 

With branded invoice templates, you can always include your project’s payment schedule and apply automated payment reminders for recurring payments

Get paid faster

Use HoneyBook’s clientflow platform to send invoices, collect payments, and automate reminders.

What is a transaction fee, and why is it necessary?

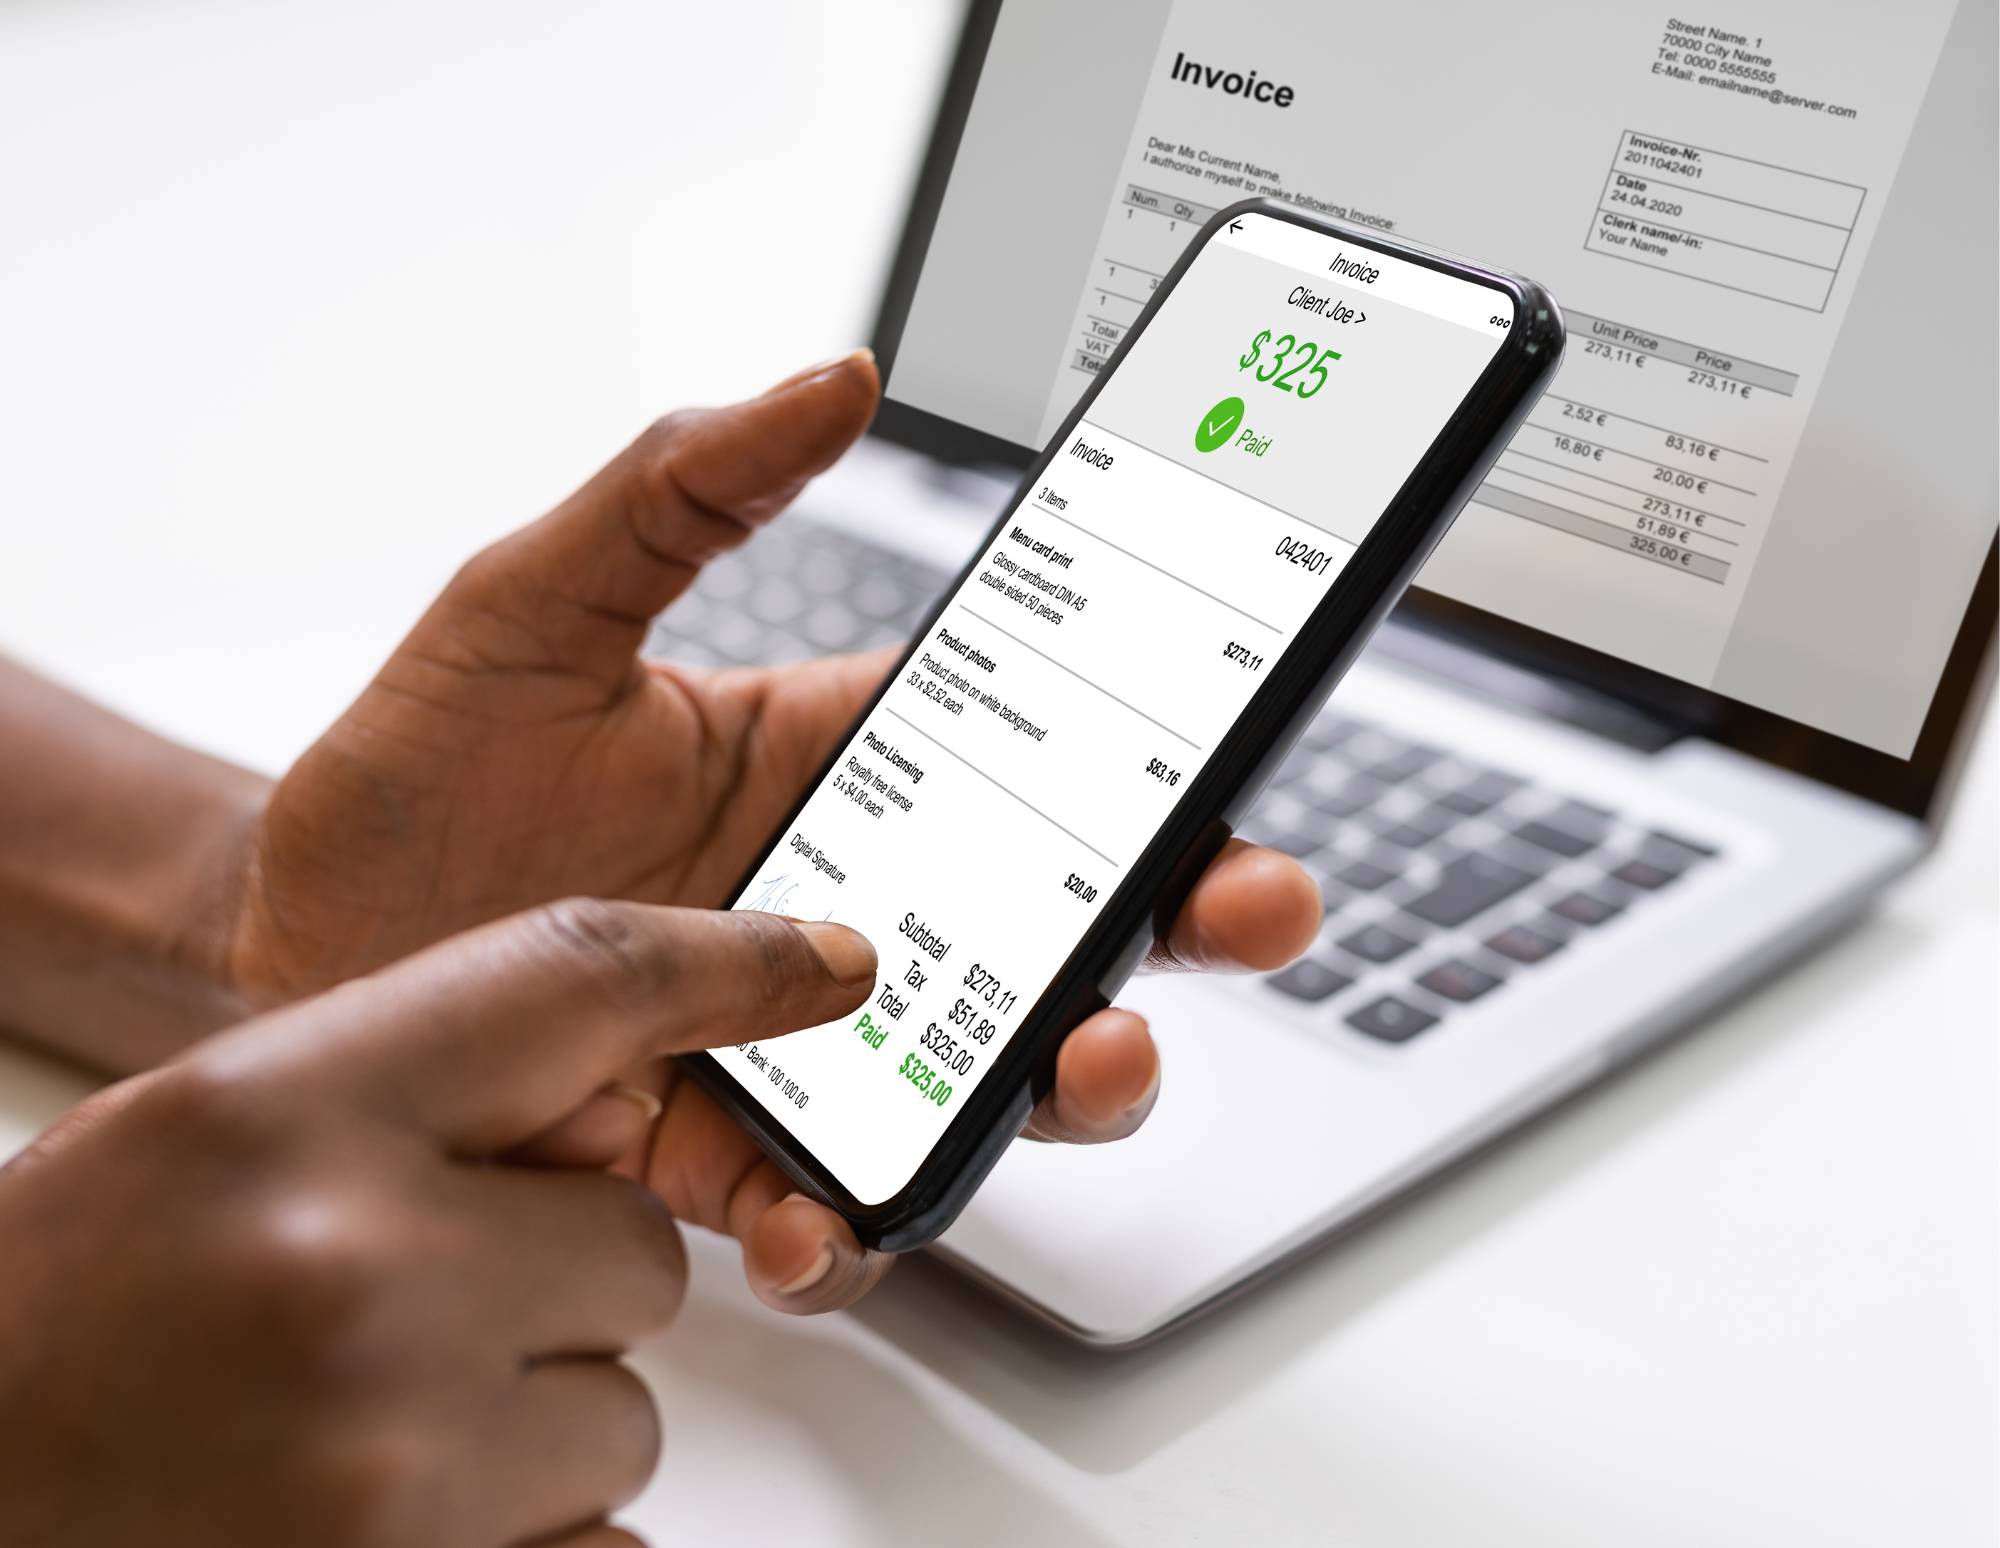
Person paying an invoice on a phone with a transaction fee

Credit card transactions and other online payments always come with transaction fees, exactly what is a transaction fee and how do they affect you  as a service provider. Learn why they’re necessary and how to anticipate their impact on your payments.

Person paying an invoice on a phone with a transaction fee

What is a transaction fee, and is it really necessary? Everyone’s seen transaction fees apply to card transactions and purchases. But when it comes to running a business, you may worry about these fees eating into your profit. You might be wondering what they’re really for and if there’s a way to avoid them while accepting payments.

Regardless of what credit card processor you use to manage client payments, you will always incur transaction fees. These fees are for the service of facilitating the payment and often differ depending on the transaction type. It’s smart to be aware of how transaction fees work and how your processors’ fees affect your business and the services you offer. 

Learn more about how these fees are calculated and how you can prepare for them when accepting online payments. 

Jump to:

Why payment processors collect fees

Transaction fees are part of the payment process because that’s how processors earn money. In exchange for the service of processing payments, the processor charges a fee. Just as you require payment for the delivery of your services, so does the payment processor to cover the costs of facilitating the payment. 

These costs include processing equipment and software, employee salaries, and other overhead expenses. By charging a fee for each transaction, the processors are able to stay in business and continue providing their services.

How payment processors calculate fees

Transaction fees are typically a percentage of the total transaction amount, plus a fixed fee. For example, a processor may charge 2.9% + $0.30 per transaction. This means that for every $100 processed (paid or transferred from client to provider), the processor will collect $2.90 in fees plus an additional $0.30 per transaction. Other payment processors may charge a flat fee for each transaction. 

There may also be additional types of credit card processing fees, such as:

  • Interchange fees – Fee amounts that are encrypted and levied by payment processors, such as credit card issuers. They represent a percentage of the total transaction cost and are usually split among the merchant, issuing banks, and networks for covering their costs in processing transactions.
  • Authorization fees – Often charged by payment processors when a consumer authorizes their card to complete a transaction. This is usually a flat fee of between $0.10 and $1 per authorization depending on the processor being used. These charges are typically levied either directly by the issuing bank or by a credit card company such as Visa, Mastercard, or American Express.
  • Gateway processing fees – Charged by payment gateway providers such as PayPal, Stripe, and Authorize.net for connecting a merchant’s online store to their payment system. These fees typically range from 1% to 4% of the transaction amount plus an additional $0.25 to $0.50 per successful checkout, depending upon the processor being used.
  • Foreign transaction fees – Charged by payment processors based on the currency being processed and sometimes also for international transactions between countries. Payment processors such as PayPal, Stripe, and Skrill typically levy fees for currency conversions. Many banks worldwide, however, do not charge additional conversion fees for international payments using their own networks/payment systems.
  • Chargeback settlement fees – More of a risk incurred than a regular fee, these fees are typically charged by payment processors or issuing banks when a consumer’s credit card is used to make fraudulent purchases, or a client issues a chargeback.

Depending on your merchant agreement and individual business needs, some of these fees may apply to you and some may not. Be sure to read all the fine print before committing to a payment processor so that you understand fully which fees they charge and how these will affect your bottom line.

Pro tip

HoneyBook’s payment processing offers some of the lowest transaction fees in the industry. There are no additional fees, which makes it a great option for independent businesses. 

Why fees vary for different transactions

There are a few reasons why different types of transactions command varying fees.

First, businesses have different fee structures with their payment processors. Some processors charge a flat rate per transaction, while others take a percentage of the total amount. Some providers offer tiered pricing, where lower fees are charged for transactions below a certain threshold (e.g., $100) and higher fees for those above it. Others also charge monthly fees for using their software. 

Second, the type of card you use can also affect fees—for example, American Express cards typically have higher fees than Visa or Mastercard. This is because payment processors usually consider them a riskier investment for businesses. Amex cards generally have higher interest rates and late fees, meaning that there is a greater chance the cardholder will default on their payments.

Finally, the total transaction amount also affects how much the fee will be. Generally speaking, larger transactions will have higher fees than smaller ones. As mentioned, payment processors make money on a percentage of the total transaction amount. So, the larger the transaction, the more money they make from fees. That said, there are usually minimum fee amounts assessed per transaction regardless of size—so even a small purchase might have at least a few cents added on.

Types of transactions that include fees

We may have answered the question, what is a transaction fee, but exactly which types of transactions are eligible for them? Today, people have a lot of payment options to choose from, which means that transaction fees can vary. Payments using ACH (Automated Clearing House), credit cards, and electronic money transfer services are the main types of transactions that include fees.

ACH payments

For ACH payments, money transfers directly from one bank account to another without involving a third party such as a credit card. These transactions tend to have lower transaction fees, but they usually take longer to process than credit card transactions.

Overall, ACH payments can be beneficial if you’re looking for a lower transaction fee. However, the time to transfer can affect your cash flow each month if you take on a majority of ACH payments. Furthermore, ACH transfers involve a bit more risk since you can face nonpayment due to a closed account or insufficient funds. 

Credit card payments

Credit card payments come with their own advantages compared to ACH options. Typically, they transfer faster than ACH payments. However, because there’s a bit more involved in credit card payments, their transaction fees are slightly higher. 

Payment processors commonly also charge separate fees for cardholder-entered and card-on-file transactions. That means that you’ll be charged differently for one-off transactions versus long-term payments over time that are easier to collect when your client’s card is on file. 

Credit card payments are usually easier on the client side, which makes them preferable. In fact, in a recent study, 80% of customers preferred paying via credit card, compared with 31% who preferred paying with ACH transfer. 

Pro tip

Among HoneyBook members, we found that card-on-file payments are 20% more likely to be paid on time. It takes the guesswork away from you and your clients, making it one of the most appealing types of transaction.

Industry-standard fees for common payment processors

Curious how the biggest players in the industry are applying transaction fees? See how Stripe, PayPal, Square, and HoneyBook compare. We’ve pulled each company’s cardholder entered fees so you can take a look below.

  • Stripe offers a pay-as-you-go setup, forgoing recurring fees with a 2.9% + $0.30 transaction fee per successful card charge 
  • PayPal, being one of the most mature platforms around, has a stratified transaction fee structure that also follows the percentage + fixed fee format. Fees depend on whether the transaction is domestic or international, and also in which country/territory it was made. For merchants, the amount they receive also changes the percentage PayPal takes off the top, although the fixed fee remains as is. For standard credit and debit card payments, they charge 2.99% + the fixed fee.
  • Square charges a standard processing fee of 2.9% + $0.30 per transaction for cardholder-entered payments..
  • HoneyBook charges 2.9% + $0.25 for cardholder-entered transactions, with no additional fees.

While transaction fees are one of the most important factors to consider as you’re choosing a payment processor, take a look at the additional tools each processor offers. Some might include invoicing, fraud monitoring, and other benefits, while others will stick with just payment processing. 

If you want to take your payments even further, consider an all-in-one clientflow management platform that allows you to capture leads, vet them, book them (and accept payment), then manage your projects. 

Accept payments and manage your entire clientflow with HoneyBook

As an independent service provider and business owner, you’ve got a lot on your mind, and issues like what is a transaction fee, should be the least of your concerns. But, like every other part of your business, it is something you think about and want to get right. 

The same goes for how you onboard clients, set up your workflows, issue an online invoice to a client, and complete projects. HoneyBook not only can help you run a cost-effective business by offering some of the most competitive transaction fees, but the online payment software also supports every step in your clientflow. 

From the first hello to final payment, HoneyBook empowers independents with the tools to automate, connect, and customize the processes and client experience that work best for their business. 

Collect payments with some of the lowest fees in the market

Start getting paid while leveraging more tools for your clientflow.